

By Libbie Summers
I was ahead of my time...or 50 years behind it.
My first plate wall was fashioned out of necessity. At 19, on a trip to France, I bought my first antique plate –a sweet dessert plate with little pink flowers and a gold rim (I still have it today). The plate cost was perfect -5 francs AND it fit perfectly in the only luggage I had...my backpack. Before long, I had amassed a collection of antique plates way too large for someone living in an apartment the size of a Beverly Hills Housewife's closet. I loved each one of these utilitarian pieces of art. I loved their provenance. I loved thinking about what foods were served on them. And, I LOVED imagining the dinnertime conversations each plate may have overheard.
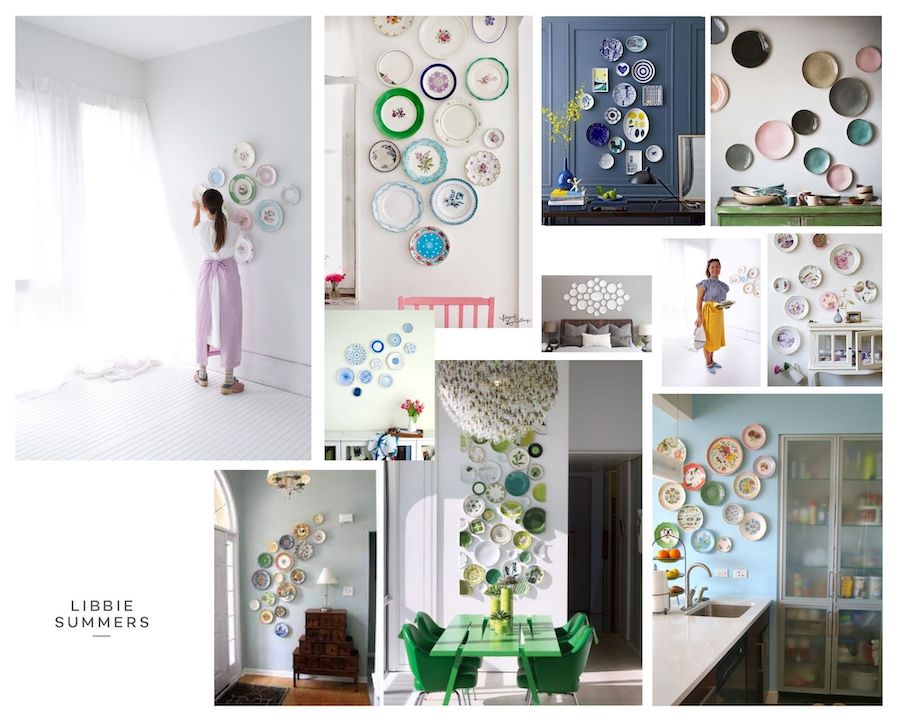
And so began my love of a plate wall. From floor to ceiling in that first tiny apartment with no storage space, I hung my plates -the wall was my canvas and my dish pantry. My favorite plates to use for dinner were kept low enough to remove and replace. Stephanie (a friend from those early days) still talks about coming for dinner at that jewel box of an apartment and being asked to remove her dinner plate from the wall! This "Design to Dinner Table" approach to using vintage china as an artful design element and as utilitarian dinnerware still informs my work life today. 


How To Hang a Plate Wall
(this method is for using plate hangers)
What you need:
Weighted paper (butcher's paper, wrapping paper etc...)
Scissors
Painter's tape
Black Sharpie
Vintage plates
Plate hangers sized according to plates (I use these, but these are good too if you don't want to see the hanger)
What to do:
1. Cut the paper to the exact size of your wall/hanging area (You may need to tape pieces of the paper together to get the size you need.)
2. Lay the paper on the floor and arrange your plates in the artful pattern you want to see on your wall.
3. TAKE A PHOTO of the arrangement. DO NOT FORGET THIS STEP!
4. Use the marker to draw around each plate. Set plate aside.
Continue to trace each plate. NOTE: if you have a lot of plates that look the same, but are varying sizes, you may want to number the paper and the plates using painter's tape.
5. Using painter's tape, tape your paper to your wall.
6. Hammer the nail/hook from your brass plate hangers to the top of each circle.
7. Carefully remove the paper without pulling out the nails/hooks.
8. Attach the plate hangers to your plates.
9. Reference your photo and hang your plates on their coordinating nail/hooks!

Aren't my mother-in-law Peggy and her dog Pippa the cutest! This is her adorable little home in the historic district of Savannah.