

makes 1
What you need:
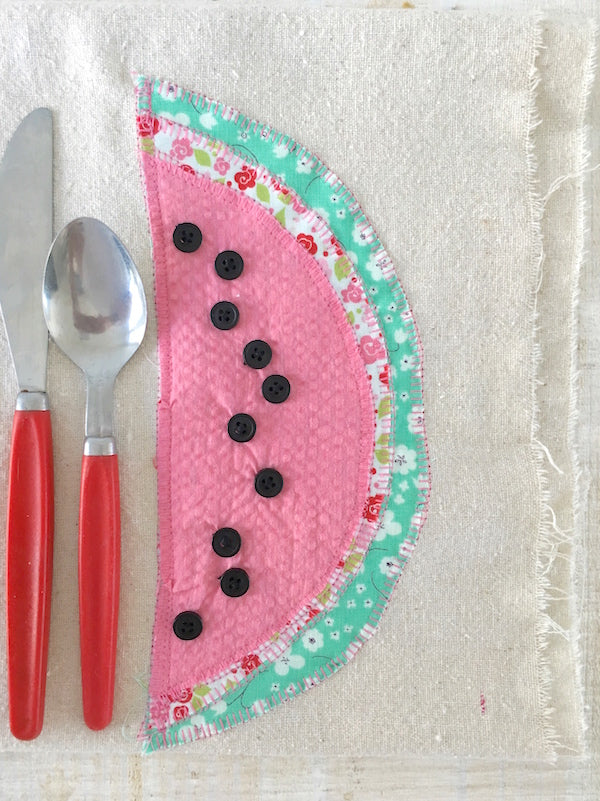
1 piece of muslin 12-inch x 18-inch (I like a big napkin)
1 piece of copy paper (to make pattern)
1 small scrap (approximately 8-inch x 6-inch) of green patterned fabric (will be the outer rind)
1 small scrap (approximately 8-inch x 6-inch) of white patterned fabric (will be the inner rind)
1 small scrap (approximately 8-inch x 6-inch) of pink fabric (will be the watermelon flesh)
10 small black buttons (will be the seeds)
Coordinating thread
Scissors
pins

What to Do:
1. Fold paper in half and draw a half circle from fold end to fold end touching the bottom of the paper. Cut out. You should have a half watermelon type of shape. Feel free to freehand, I like it much better. No watermelon is perfect.
2. Working with the green fabric first, pin the paper to the fabric and cut around. Remove paper.
3. Starting 1/4-inch in from the top edge of the watermelon, cut around the curve of the paper. Do not cut across the top of the paper. You are making the pattern slightly smaller.
4. Pin the smaller pattern onto the white fabric and cut around. Remove paper.
5. Repeat step 3.
6. Pin the new smaller pattern onto the pink fabric and cut around. Remove paper.
7. Stack the cut fabric piece on top of each other with the straight edges aligned. You should have space between each. Pin together.

8. Pin stack to the bottom center of the muslin fabric (leaving at least 1-inch from the edge).
9. Sew across the curve of each layer starting with the green, then white, then pink.
10. Sew across the straight edge.
11. Sew “seed” buttons on in a random pattern near the straight edge.